|

Welcome To My Head & Neck
Adapters Page.
Soldier Story Head Saturday Toys Head Loading Toys Head
Headplay Head
Toys City Head ACI Head
DiD Head
Dragon Head
Alert Line Head +
DiD Body Adapter
Even though I said I have sort of dropped out of
the hobby at the moment, I just wanted to see as an experiment if I could use the spare Dragon Neo 2 bodies I have here spare with these heads. Since I prefer
to use the older Dragon bodies for my kitbashes, as I have found them both cheaper to buy, plus also for my purposes they are a lot easier to adapt to get
better body shapes and poses. Plus they don't have the standard 1/6th body shape of a 6 foot, built like a brick out house look to them either.
Body Neck Connectors
1.  2.
2.  3.
3.  4.
4.
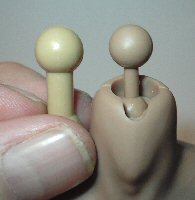
Picture
1. is
the main body I use for my figures which is the
older Dragon Neo2 type, the neck connector for this is shown above. In Picture
2. this is the neck connector for the Figures Home nude body I
have, which I bought out of curiosity to see how close it is to the Dragon body.
And I found that these are very similar to the older Dragon bodies I have, and
with the one I have here as a spare it compares well to it.
The only real difference I have found with the
Figures Home body is they don't have the joint in the foot like the Dragon
bodies have, and the leg to hip joints are slightly slack which leads to
shelf diving. Although I have found that they are slightly taller at the
shoulders, when alongside a Dragon figure. In Picture
3. this is the neck for the DiD body, and with the hard plastic
connector I have found that it takes a lot to cut and sand it down to accept the
other manufacturers headsculpts.
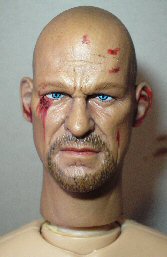
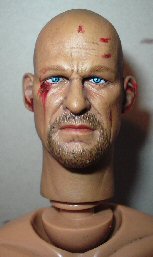
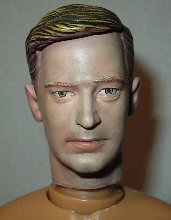
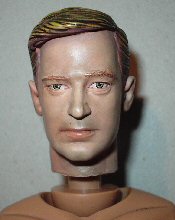
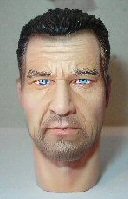
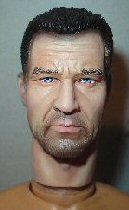
Fitting a Soldier Story head to various bodies
This page has come about because of my curiosity
originally regarding the Soldier Story heads, and if they can be used with a
Dragon body?
With the neck connectors being so different on the two bodies, I got to wondering about some neck adapters that I found online, and
if these could be used to connect one to the other. One of my main reasons for trying this out is cost, as I have found that some of the complete Soldier Story
nude bodies can be expensive, and that is before I even look at the shipping price on them as well. So to go for a cheaper option I went with two of the
adapters and a separate Soldier Story head instead.
1.  2.
2.  3. 3. 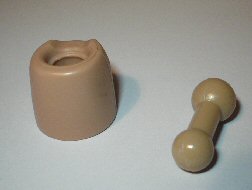 4.
4. 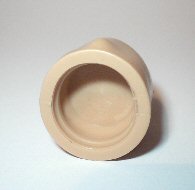
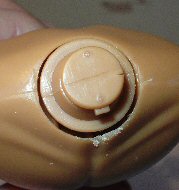
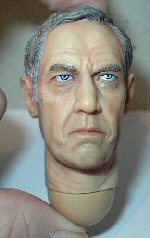
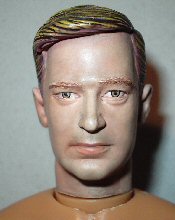
The pictures here 1.
& 2. are of the Soldier story head and body
connection, Picture 3. is of the parts for
the Headplay short neck adapter which I thought might work with the Soldier
Story head on a Dragon body. Picture 4.
is the inside of the Headplay neck adapter.
5.
 6. 6.
 7. 7.  8. 8.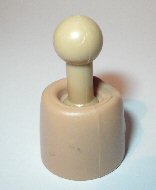
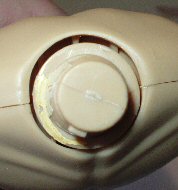
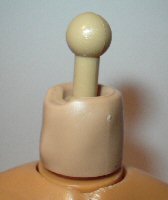
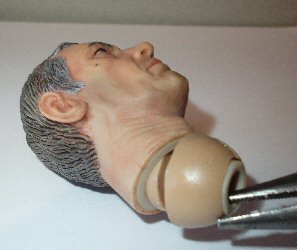
In Picture 5.
this is where my problems began, because the inside of the neck adapter is not
deep enough to sit down fully on the Dragon body, plus as shown in Picture
6. one end of the double ball joint
connector is too big to fit into the base of the Soldier Story head, plus as
shown it is also too big to fit into the Headplay adapter as well. In Picture
7. I have turned the double ball joint
connector around to show the other end as a smaller ball joint which will
fit into the base of the Soldier Story head, but the larger end will not fit
into the adapter. Picture 8. shows how the
adapter assembles together as designed by Headplay, but as I have mentioned
before, to make this fit the Soldier story head as it is, I will have to sand
down the upper ball joint to get it to fit.
9.
 10. 10.
 11. 11.
 12. 12.

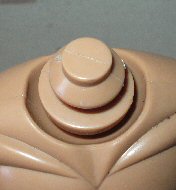
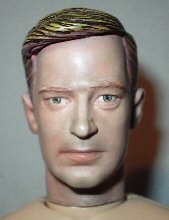
In Picture 9.
I have tried to show how much bigger the upper ball joint is when compared to
the Soldier Story head. In Picture 10. this
shows just what would have to be done to make the Soldier Story head fit not
only the adapter, but also what changes I would have to do to the Dragon neck
as well to be able to use the short neck adapter. In Picture
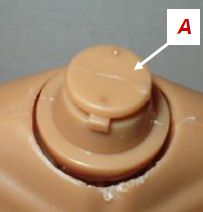
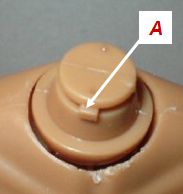
11. the top part of the Dragon neck
connector shown as A would have to be cut
off, so that the Headplay adapter would sit lower and close up the gap at the
bottom as shown in Picture 5. above.
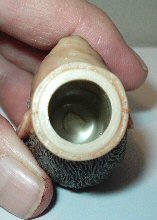
Picture 12.
above shows both of the ball joint connectors together, the one on the left is
the Headplay connector and on the right is the Soldier Story connector. So from
this I can say that the Soldier Story head with a Headplay adapter, without a
lot of work cannot connect to a Dragon headsculpt, which also rules out the
Figures Home body as well as the DiD one.
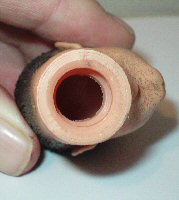
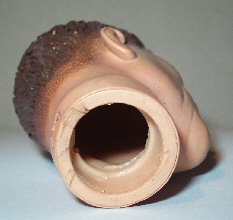
Fitting a Loading Toys head
Another head that I bought recently is the Marcus
one from Loading Toys, this came with a soft plastic neck adapter which I
removed by placing the neck in some hot water to soften it so I could remove the
adapter. Picture 13. shows the adapter in
place and Picture 14. shows the adapter after
I have removed it.
13. 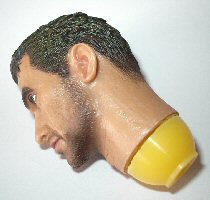 14.
14.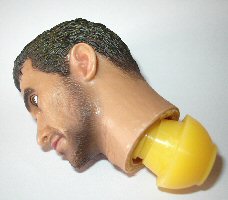 15. 15.
 16. 16. 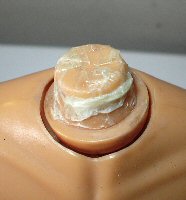
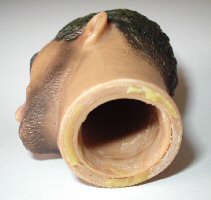
Once the adapter came off did I realise that it
had been glued in place, as shown in Picture 15.
with the glue residue that has been left on the base of the head. One problem I
have now found with the head and a Dragon body is that the hole in the head is
slightly large, which makes the head loose on the body. To get around the problem of the head now being
slightly loose, Picture 16. shows how I have
had to bulk out the Dragon neck connector slightly with some double sided tape
to hold the head in place. Mainly because the head is made out of some kind of
resin, so as I see it at the moment I cannot glue it in place.
17.  18. 18.
 19. 19.
The pictures above show how the Loading Toys head works
with a Dragon body in Picture 17. Picture
18. the same method of the tape has been used
with a Figures Home body. Picture 19. shows
the head on a DiD body and how it sits on top of the connector, which would have
to be trimmed down to make the head fit. Note:
This would have to be done carefully to keep a tight fit for the head.
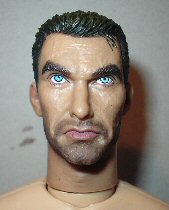
Fitting a Saturday Toys head
20.  21.
21.  22. 22. 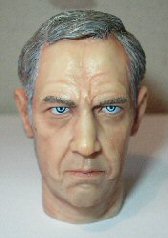 23.
23. 
This headsculpt is another one that I bought loose
that I used on my Colonel
page, Picture 20. is how it came with the neck adapter fitted and for me to use
it with a Dragon body. In Picture 21. I
placed the connector and neck into some hot water to soften it, and with the
help of some long nosed pliers, I am removing the bottom neck connector. Picture
22. is the head with the connector removed,
Picture 23. shows what the neck now looks like.
24.  25.
25.  26.
26. 
Picture 24.
shows the head placed onto a Figures Home Body, Picture
25. is the head on a Dragon body. Both of these allow me to use the
head as it is without any further alterations, and it fits very well as a tight
fit by just pressing it down onto the body neck connector. Picture
26. is the head on the top of a DiD body neck
connector, and as shown it will take a bit of work to get it to fit. By either
removing the inner ring (not recommended) on the head, or by the better option
of trimming down the DiD neck connection. Note:
This would have to be done carefully to keep a tight fit for the head.
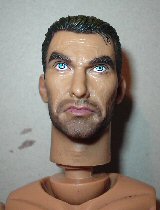
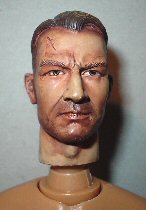
Fitting a Headplay Head
27.  28. 28.
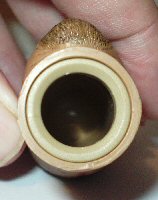 29.
29.
 30. 30.
 31. 31.
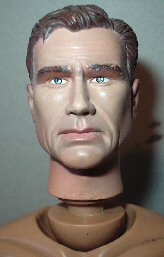
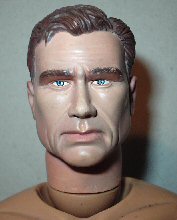
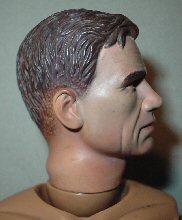
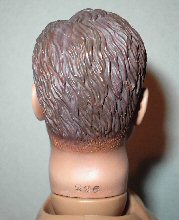
Another item I have bought recently is a loose Headplay head, as I do like the facial detail on them. And I have found that
they can be fitted to the Dragon Neo 2 bodies quite easily. Picture
27. is the head as I got it, with Picture
28. showing the inside of the connector for the
neck.
Picture 29. is
the head on a Figures Home body, Picture 30.
is the head on a Dragon body both fit very well just by pressing firmly down
onto the body. With a DiD body in Picture 31.
the neck for the body has to be again altered to get the head to fit.
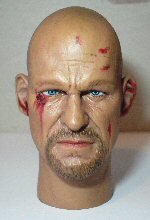
Fitting a Toys City head
Another item I have bought recently is a loose
Toys City head, as I liked the facial detail on this headsculpt.
Note: The flash from the camera has made
this head look more glossy than it actually is. With this
headsculpt it is like the other heads in that it is made from some kind of
hard resin, which I have found makes it difficult to fit onto the Dragon body.
32.  33.
33.  34. 34.
Picture 32. is
the headsculpt as it came to me, and Picture 33.
shows the inside of the head that connects to the body which with the ridge
inside that I have found hits onto the peg as shown in Picture
34. on the Dragon body .
35.
 36. 36.
 37. 37.

In the above pictures you can see how the head
fits onto the different bodies I have used here, Picture
35. is the Dragon body and Picture 36.
is the Figures Home body. Both of these are loose and have a small gap at the
bottom caused by the ridge inside the head hitting against the peg on the two
body neck connectors. To close the gap I will have to remove the peg on the body, and
also wrap the neck connector in the double sided tape to keep the head tight and
in position. Picture 37. is the head on a DiD
body, and like most of the other heads used here the neck connector has to
altered to allow the head to be fitted to it.
Fitting an ACI head
This is another head that I have had for a while
now and I have added to this page, about how it can be adapted to fit onto a
Dragon body.
38.  39.
39.  40. 40.
 41.
41.
Which did surprise me as it was so easy to do,
Picture 38. shows the head as I got it,
Picture 39. shows the inside of the neck
joint which is very similar to the Dragon headsculpts. The only alteration I had
to do to the head to get it to fit onto a Dragon body, was to cut out the notch
inside the head a bit better. As shown in Picture 40.
the head fits onto the Dragon body with no distortion to the neck, and by making
sure that the peg in Picture 41. lines up
with the notch in the neck.
42.
 43. 43.
 44.
44.
Then as shown in Picture
42. I have just pushed the head onto the Dragon body, by using the
same method in Picture 43. I can also fit the
ACI head onto a Figures Home body as well. In Picture
44. I have tried to fit the head onto a DiD body, but like the other
heads here the DiD neck connector will have to altered for the head to fit.
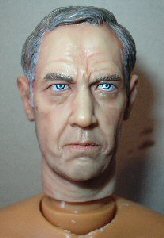
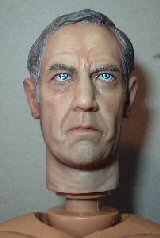
Fitting a DiD head to a Dragon body
45. 46. 46. 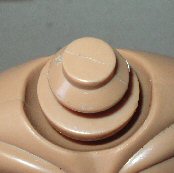 47.
47.
 48. 48. 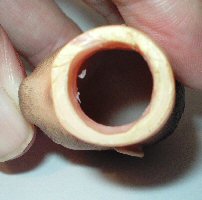 49.
49. 
With these figures I am tending to stay away from them as they are of the standard 6 foot muscular body type, and I have found
that it is a lot of work to alter them down to anything else. Especially with the moulded chest muscles, because to me they make a tunic stand out too far in
this area. Picture 45. is of the standard DiD
head and picture 46. is the neck joint for
the head, Picture 47. is the hole for
connecting the head to the DiD body. Picture 48. is after
I have enlarged the
neck joint with my model knife to fit the Dragon body. Picture
49. is the adapted DiD head fitted onto the
Dragon body.
50.
 51.
51.
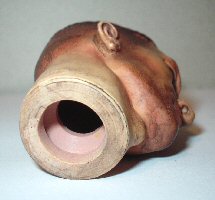 52. 52.
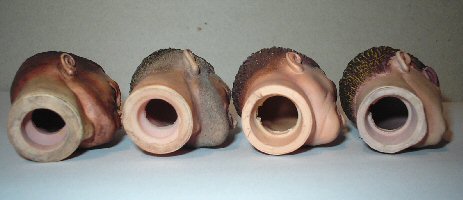
In Picture 50.
above I have lined up 4 heads for comparison regarding the hole for the neck
connections, from the left I have a older DiD head, another later DiD head, a Dragon
head and finally the ACI head. With regards to my reasons for altering the DiD
head as shown in Picture 48.
You can see in Picture
51. the thickness of the material used to make the head at the neck,
and in Picture 52. how it sits high on the
neck connector of the Dragon body.
Note: It has
been mentioned to me about heating up the neck joint on the head with a
hairdryer, so that it can fit better onto the neck connector, I have not tried
this method myself. But it does look like it could work to get the newer DiD heads onto
the Dragon body, but I would be concerned about getting the heat source too
close to the face and maybe damaging it.
53.
54.
55.
 56.
57. 56.
57.
The pictures above are of the heads on a DiD body,
Picture 53. is the Saturday Toys head,
Picture 54. is the Headplay head and Picture
55. is a Dragon head, Picture
56. is the Toys City head and Picture
57. is the Loading Toys head. All of which have to be
altered to get the head fitted, the easiest way of doing this as I see it is to
cut down to the neck connector instead. As there is less chance of damaging the
base of the head by altering the body neck connector instead. Note:
This would have to be done carefully to keep a tight fit for the head.
Fitting a Dragon head to a DiD body
58.  59.
59.  60.
60.  61.
61. 
As another experiment I have tried to fit a Dragon
headsculpt onto a DiD body, I remember doing this before but I could not recall
what the results were. To get the head in place with altering
anything I held the base of the head in some boiled water for about a minute,
and as shown in Picture 58. the head can fit onto the DiD body. But as shown in
Picture 59. and especially in Picture
60. the neck on the head distorts out of
shape. Also as shown in Picture 61. the head can come back off easily as it is
not held in placed very firmly, plus you can also see how the base of the head
at the neck has become distorted.
Note: I know that there are other body types on the market, some of which do look very good and they also have the ability
to hold a pose well. But I just cannot really justify spending up to Ł30.00 - Ł35.00
+ shipping on just one nude figure for a kitbash, so this is why
I am staying with the Dragon
bodies at the moment and I have mainly based this page around them.
| 