|

Welcome
To My Gebirgsjager Backpack Changes Page Two.
Dragon Backpack Alterations 1
Dragon Backpack Alterations 2
Dragon Backpack Alterations
Method 1
Like all of the other parts I have used on my figures, I want to make some slight changes to the
Dragon Wilhelm Engels backpack. Because I
want to make a kitbash of a gebirgsjager, where he is carrying another on his back. But I have found out from Patrick (Heeresbergführer),
like most of the 1:6th scale german backpacks they are missing the lower straps.
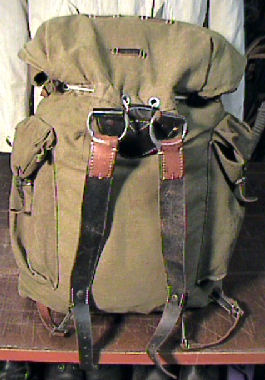
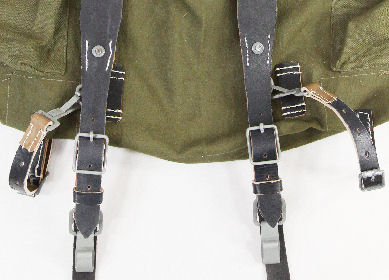
So I have had to make some changes, that are
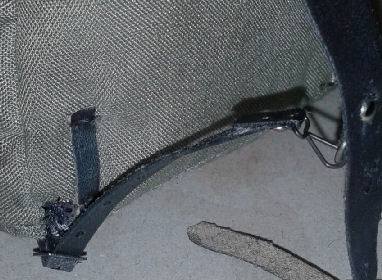
similar to the backpack picture on the right. This first method here is that I
have put some rings on the bottom of the backpack, so that the new auxiliary
straps can hook onto them. The first thing I had to do was find a pair of DiD
'Y' straps in my spares box, as I needed a pair of rings from it.
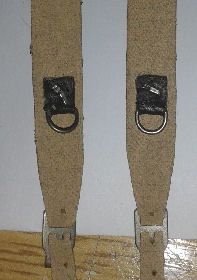
As well as the four Black hooks, as I want all of
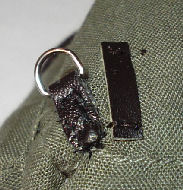
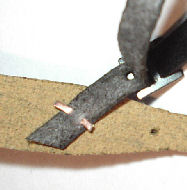
the hooks to look the same on the backpack. I also used some thin leather material, to make the connectors as shown in
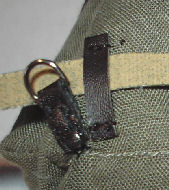
Picture 1. below. Which I then sewed onto
the bottom rear corners of the backpack, making sure that the centre belt strap
can still go through the loops at the bottom as in Picture
2.
1.
 2.
2.
 3. 3.
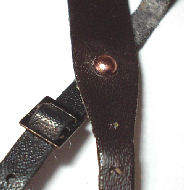
I then had to make the connectors and the
auxiliary straps, that are connected to the main shoulder straps. So I cut the
auxiliary straps off the DiD 'Y' strap. To replicate the rivet holding both straps together, I
have used two of the
tiny brads that I used for
the shoulder boards on my figures. In Picture 3.
I have made a tiny hole in the material, so that I could push the brad through.
4.
 5.
5.
 6.
6.  7. 7.
 Picture
4. shows the back of the straps,
with some of the length of the brad cut off before it has been folded over to
keep the auxiliary strap in place. To allow a little bit of movement with the
strap, I put my model knife blade under the strap before I bent the brad pins
over. I also trimmed the strap so that end is hidden behind the main strap. Picture
4. shows the back of the straps,
with some of the length of the brad cut off before it has been folded over to
keep the auxiliary strap in place. To allow a little bit of movement with the
strap, I put my model knife blade under the strap before I bent the brad pins
over. I also trimmed the strap so that end is hidden behind the main strap.
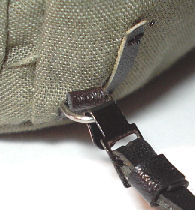
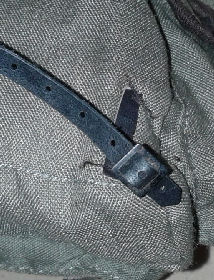
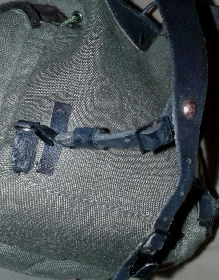
In Picture 5.
the auxiliary strap end is test fitted onto the lower backpack connection,
Picture 6. shows the backpack fitted to a
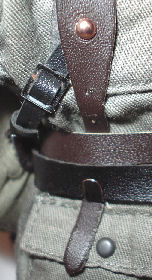
test figure, to see what all of the straps look like. Picture
7. is of one of the auxiliary straps, hooked
onto the bottom of the backpack. I still have to adjust these straps to a
tighter fit, and the loose end as shown in Picture 4.
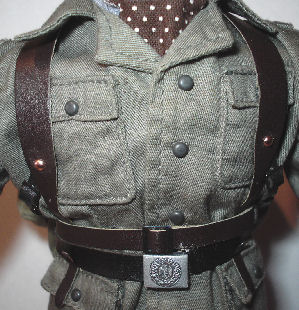
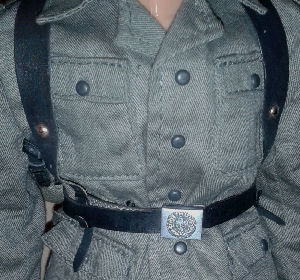
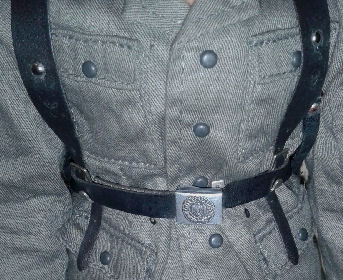
trimmed off slightly. The picture on the right shows the front of the backpack
on the figure, I still have to adjust the front straps so that the brads are
level.
I have found that by using the main hooks on the
front of the belt, combined with the lower backpack hooks. I can get a nice
tight fit for the backpack, which will help me to support the second figure on
the back of my main figure.
The final thing that I have to do with the straps
now that I know everything fits, is to take it off the figure and repaint all of
the straps and leather parts with some Black artists paint. That way all of the
straps match, because as shown in Picture 7.
the original straps are Brown.
 Method 2 Method 2
The second method I
have used to make the changes to a another Dragon Wilhelm Engels backpack, is
that on the bottom of the backpack instead of the rings, I have fitted a pair of buckles.
So that I can make some straps that are similar to the set on the right.
8.  9. 9.
Picture 8.
shows front of the main backpack straps, I have removed the little discs that it
came with, so that I could replace them with a pair of new brad pins. To fit the
new rings I have initially made two strips of pleather, folded over each of the
rings as shown in Picture 9. These were
first sewn into place to hold them, I then pushed a brad pin in place the same
as Picture 4. to represent the rivets.
10.
 11.
11.
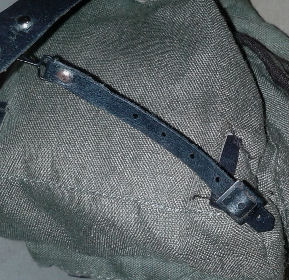
For the secondary straps, In Picture
10. I first sewed a piece of folded pleather
material with a buckle in place into the bottom corners of the backpack. Then I
have cut two of the long thin straps from the pair of DiD 'Y' straps I used
earlier. In Picture 11. I then put one
strap end through a metal spring clip, then folded over one end and secured it
with another one of the brad pins. Pictures 12.
& 13. shows the straps fastened together.
The final thing I have to do is the same as my other backpack, in that I have to
re-paint all of the straps the straps and leather parts with some Black artists
paint. That way all of the straps are one colour
Finished Backpacks
12.
 13.
13.
 14.
14.
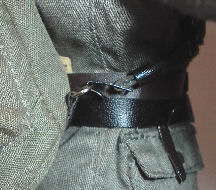
Pictures 12.
13. & 14.
are of the first Dragon backpack I altered, with the clips that now connect to the
bottom corners.
15.
 16.
16.
 17.
17.
Pictures 15.
16. & 17.
are of the second Dragon backpack I altered, this time it has buckles that connect to
the corners of the backpack.
This section is continued on
Page Three
Many thanks to
Heeresbergführer for the pictures and the
detailed help with my rucksack changes. | 