|
Important Note: I feel that I
have to point out the health effects that could be possible with using a drill
to do these modifications. Because it is a dust and also since a modeller would
be working very closely with it, I do recommend wearing a face mask to protect
yourself. Plus, the bits could damage your eyes, so I strongly recommend using
some kind of eye protection, as I would hate to think of a modeller having an
accident.
This is a very good site I found for your health and modelling -
Health these are just simple rules to bear in mind.
Please note:
This is not my work, I have included it on my pages to help my fellow modellers.
I found this snippet of information
on the Sixth
Army Group forum, and I contacted Ed about how he adapted his figures. And
he very kindly allowed me to make this page, as I feel this will help us all to
make better figures. The text in italics below are
from Ed himself. I
have this page made up as a PDF, but now I have more webspace to use, I decided
to make a webpage of this tutorial.
There's been a lot
of talk here lately about posing figures with their heads up. Also some of us
have been Dremeling away at our figures to make them more posable, or slighter,
or whatever. After a lot of thought, I decided to give it a shot. I did my first
"operation" on a figure that never quite looked right to me. I don't know why,
he's no different from my other figures, but he just seemed to lack a certain
"something." Here's what I did:
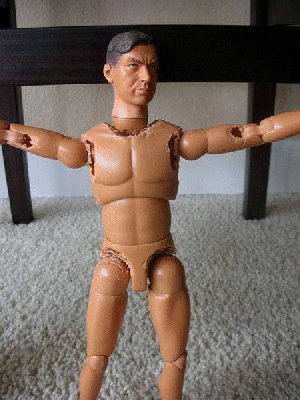
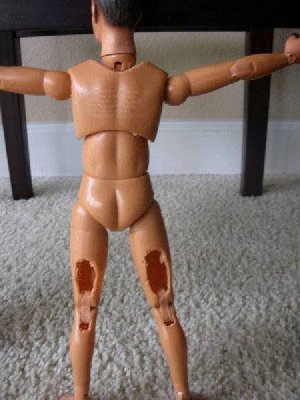
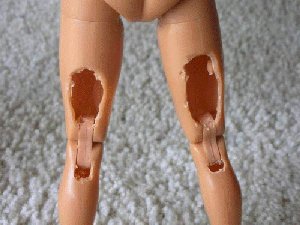
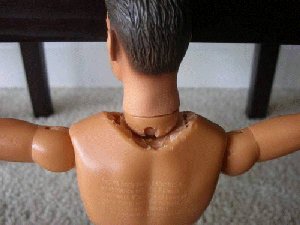
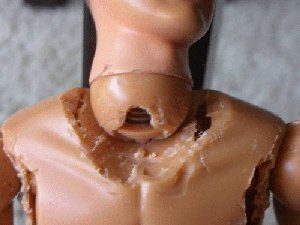
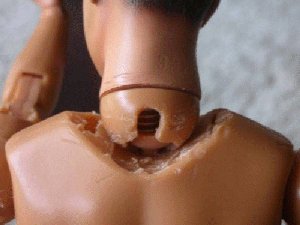
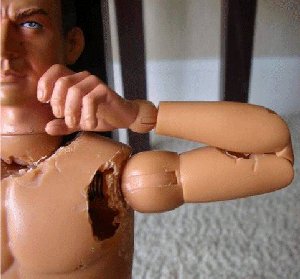
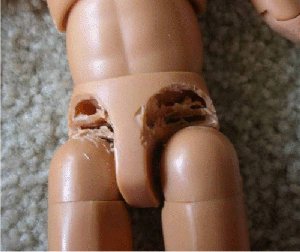
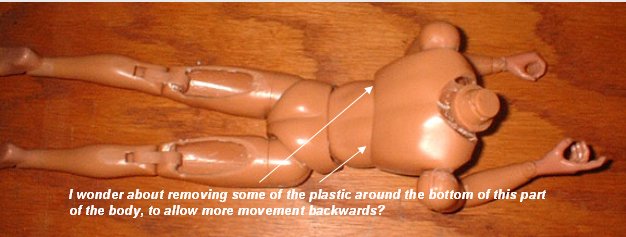
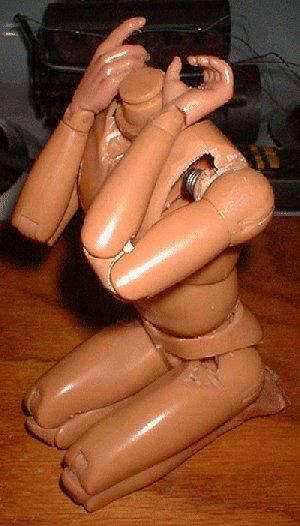
I Dremeled the back
of his thighs and cut out the plastic around the hinges, so now his legs bend
much farther; I Dremeled his "pelvis" so his knees can come closer to his trunk;
modified his biceps and shoulders for greater liberty of movement, and I also
removed a bunch of plastic around his neck. I am VERY satisfied with the
results. Finally, he can aim a rifle properly from several positions, and he can
squat better, and much more.
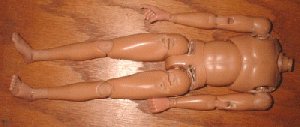
Some pics of the results follow. I apologize for not taking any pics of the nude
modified figure. I just got too excited to see how he would turn out. It took
about 45 minutes to do this first figure, but I'd guess in the future it'll take
about 20 mins per figure as I know what I'm doing better now.
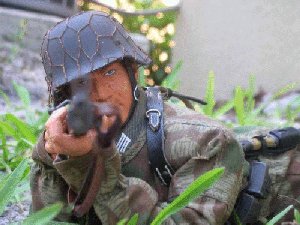
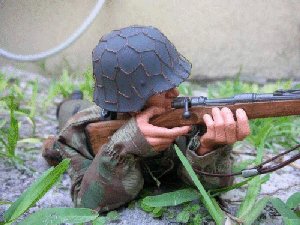
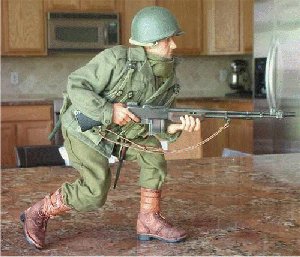
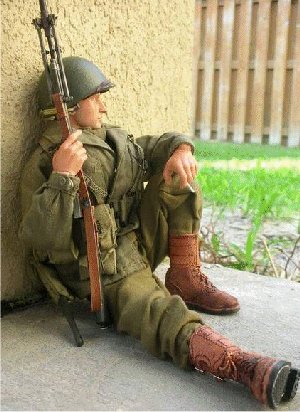
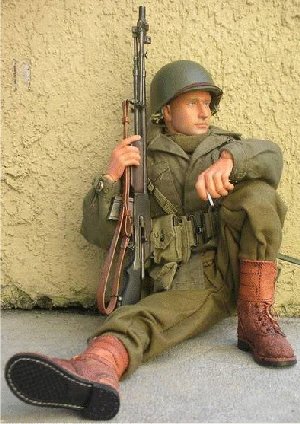
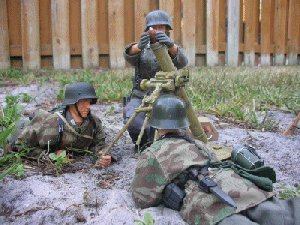
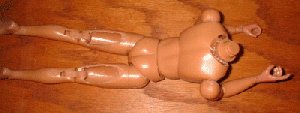
These are pictures
of how Ed has posed the figures.
It took some guts
to start this project. These figs aren't cheap, and besides that it would break
my heart to ruin a perfectly good fig.
The work and attention to detail with Ed�s
figures, and how he has adapted them into these poses has amazed me.
As I can now see a whole host of new bashes
and poses being made from my figures. As I have always had to put up with the
limited poses of 12� figures, but with the techniques shown below it will add a
whole new dimension to my models.
Body Changes by Ed
A question
that was posted on the forum about this topic is below:
Fantastic! You have addressed every
posibility issue I have with DML bodies: knees/hips for crouching,
shoulders/arms for sighting and neck for prone/sighting.
I would like to do the same, but I
am concerned that the figure would become loose. How are the joints after this
operation? Thanks!
Reply:
There is no change at all in
the tightness of the joints.
These pictures
to me, sum up the excellent method of getting a better pose from a stock figure.
I have just received a very good question from
a modeller in Singapore, regarding what 'dremelling' or a dremel tool is.
This got me thinking that I have not explained properly what that is, so to get
around that I have put in here the following information. I found this link to
help explain the tool better -
http://www.dave-cushman.net/bee/dremel.html and to
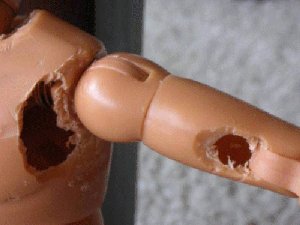
show what tools I have used to remove the plastic around the figure's joints.
The one I used on my figure is the conical (triangular) one as shown below. This
is the drill I have, I have had it for a few years now as I used to use it on my
1:35th scale models. But until I saw this tutorial by Ed Robinson, I had never
used it on my 1:6th scale figures.
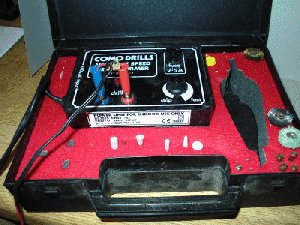
The company that made this drill is
here, and
there are many different types of this hobby drill, and the most important thing
I have found I need is the variable speed control on the transformer. Because if
the speed is set too high, it can rip into the plastic causing a lot of damage,
plus it is harder to control. So I start off with a fairly slow speed, and by
trial and error removing the plastic I either increase or decrease the speed.
Note: Try not to to keep the drill in one
place for too long, as this will create heat. The result of this is that the
plastic will melt and clog up the grinding bit and ruin it.
Note: Please take your time
if you try this method, and check regularly for the extra movement that you now
have. As this is better than removing a lot of the surrounding plastic, and
weakening the joints.
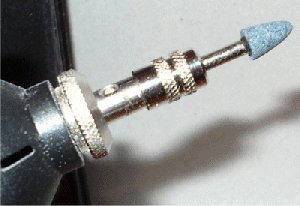

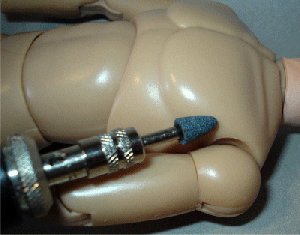
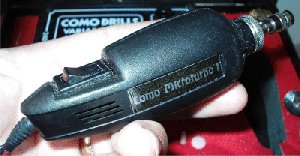
The picture above left shows the grinder bit
in place in the drill chuck, the other pictures above show the drill being
placed onto the body. Before I start to remove the plastic around the joint, to
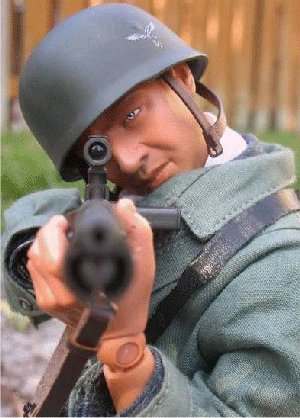
allow for the extra movement. One last thing I am wondering about is in the
picture below, would this allow a figure to be posed as a machine gunner looking
down the gun sights? As you would then have more movement in the neck and the
back.
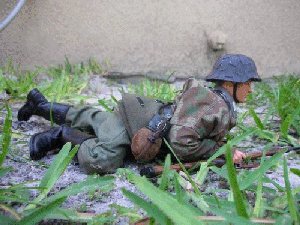
These
are the poses that Ed has been able to get from his figures.
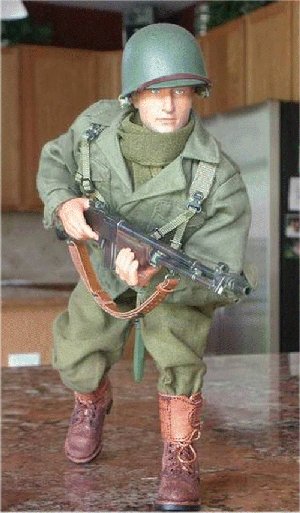
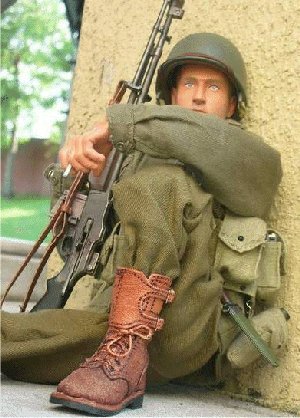


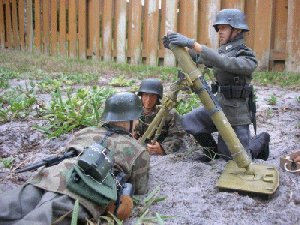

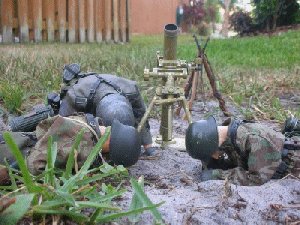
These are more images of how Ed has adapted a DML body to get a
better pose.
I have now tried this for myself, as Ed has made it look so easy
to do. And I even surprised myself with the amount of new articulation I can get
from my figures. As result of following this tutorial, I have made my
Bayonet Duel diorama.
I have made a second page about these alterations -
Bodies Page
Two
Many thanks to Ed
(1stLooey)
for the idea, and your permission to use the
images above.
| 