|
Welcome
To My Wehrmacht Sniper Page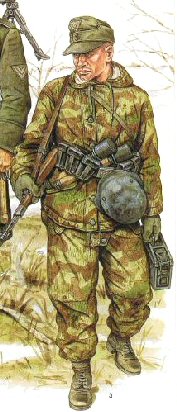
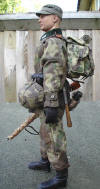
As usual with me this kitbash is based on a single
item in my spares box, as an idea for another figure. This time the idea came
about because of the Figures Home backpack I altered, as I wanted a figure
wearing it, and also with the same colour camouflaged uniform as well.
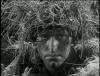
That is when I remembered about the picture on the
right, from one of my osprey reference books and from this the idea developed
about a German Heer sniper figure. I was originally going to use the Dragon Kurz
parka and trousers for this figure, but in the end I have decided to use only
the trousers combined with a Dragon Splinter smock instead.
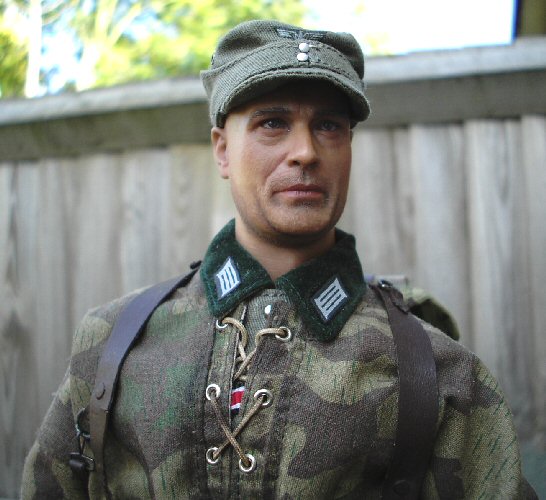
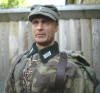
Headsculpt
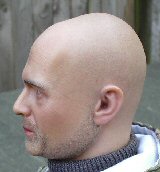

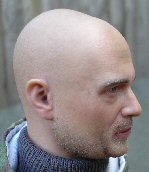

 The
head and body for this kitbash is from the DiD Herman Hanke figure, the first
three pictures are of the headsculpt as it came from the box. The next three I
have given it at light wash over with a light brown pastel chalk, which has only given
the headsculpt a slight brown tint. The main reason for this is that I did not
want to ruin the beard detail on the head, but although it has taken some of it
off, the majority of the detail is still there. The
head and body for this kitbash is from the DiD Herman Hanke figure, the first
three pictures are of the headsculpt as it came from the box. The next three I
have given it at light wash over with a light brown pastel chalk, which has only given
the headsculpt a slight brown tint. The main reason for this is that I did not
want to ruin the beard detail on the head, but although it has taken some of it
off, the majority of the detail is still there.
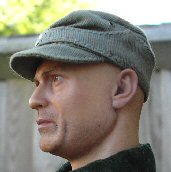
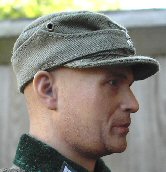
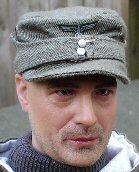
The cap on this figure is from Dragon as I feel
that it is the best one for scale at the moment, as it is the thinnest material
and it the easiest to fold into a 'flopped' appearance. To get the effect I
wanted with this kitbash and the folded look at the front, I have put some
double sided tape on the inside of the cap behind the emblems. The cap was then
put on the head and pulled down at the front over the eyes, the tape was pressed
down onto the head and then the brim was pushed back up, the tape then holds the
cap in place to get the 'collapsed' look that I wanted.
Uniform
1.
 2. 2.
 3.
3.
 4.
4.  5. 5.
 6. 6.
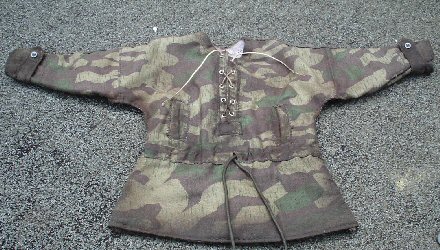
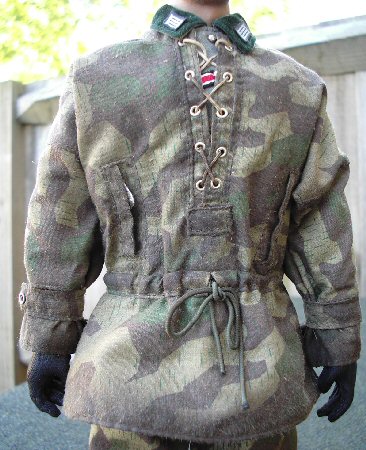
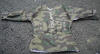
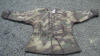
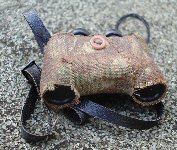
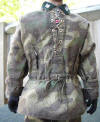
I am not sure as to the figure the smock came from
as I got it as a loose part, and the pictures above 1.
shows the new smock, pictures 2. &
3. show it after I have weathered it, I have
also made a section on this page about it -
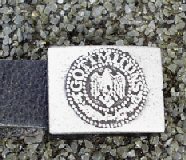
Smock. Picture 4. is of the
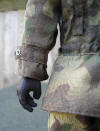
Toys City belt buckle
which has had a wash over with some Black paint, which is left to partially dry
and then wiped off carefully to leave the colour in the detail. Picture
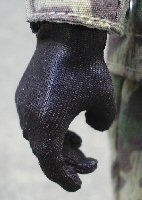
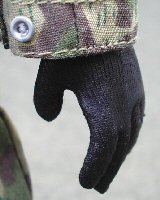
5. is of one of the DiD Konig gloves I used
fitted to a Dragon rifle grip hand, I fitted it in the same way as my other
gloves. The difference
with this hand is that I had to first separate the moulded fingers with my model
knife, and gradually put them into the glove. Picture
6. is of the other hand which is a DiD flexible one, which I also put
into the glove.
7.
 8.
8.
 9.
9.
 10. 10. 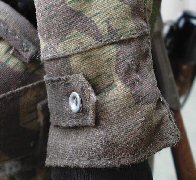
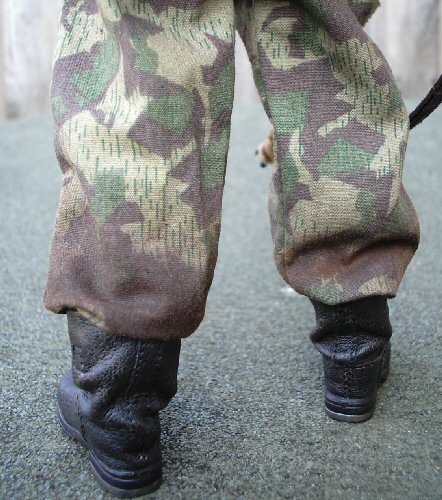
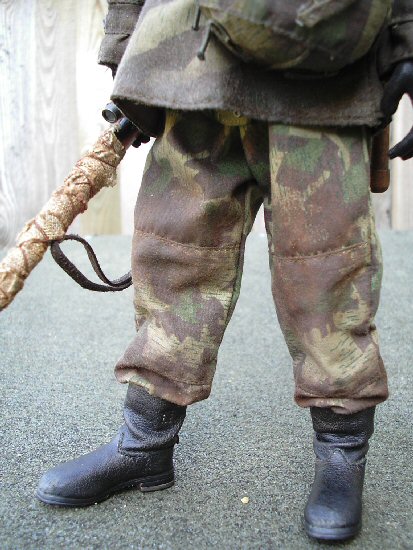
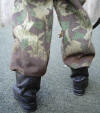
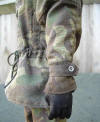
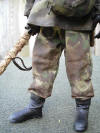
The above trousers are from the Dragon Kurz
figure, In
picture 7. & 8. I have weathered
them the same way that I have done with the smock, making sure that the knees
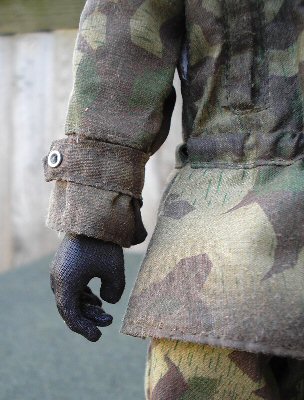
and the bottoms of the legs were dirty. In Picture 9.
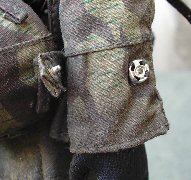
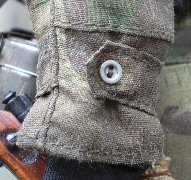
I have removed the large metal popper that is used on the strap for
the smock cuff, Pictures 10. show how
instead I have sewn the strap to the sleeve, so it looks as if the button is holding
the strap in place instead.
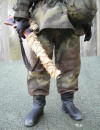
Boots
12.  13.
13.
 14.
14. 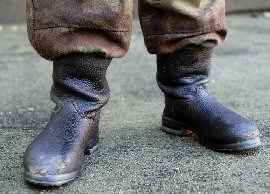
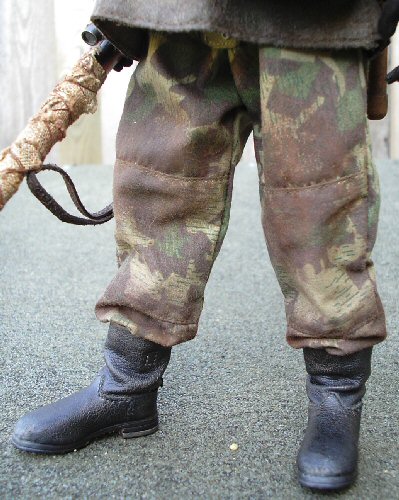
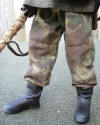
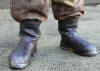
I was going to use a pair of laced boots for this
figure as in the picture, but in the end I have decided to use a pair of DiD
short jackboots instead. But I did find a problem with them once they were on
the figure, in that they did not support the ankle joint fully, and as result
the figure kept falling over after a while. So in Picture
12. I have used some thick tape to
both stiffen and support the joints, which has helped to stop the figure from
falling over. Picture 13. is of the DiD
short jackboots as they were when I got them, in Picture
14. I have very gently sanded the toes to get a worn look to them.
Note: Be very careful as the 'pleather'
material is very thin and can easily tear.
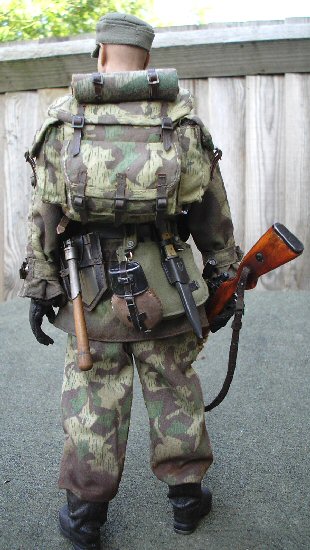
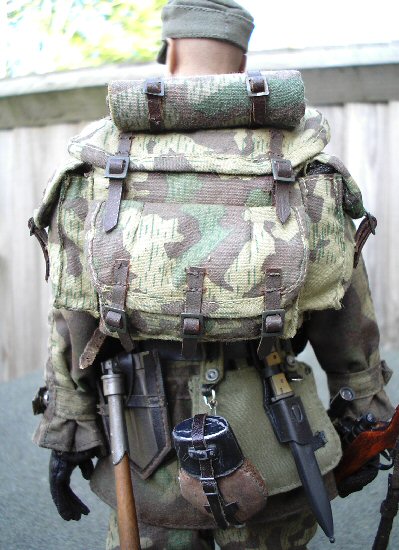
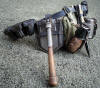
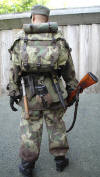
Equipment
15.
 16. 16.
 17. 17.
 18. 18.
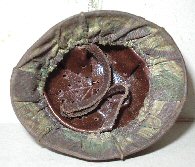
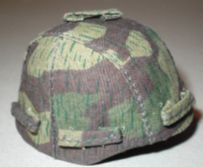
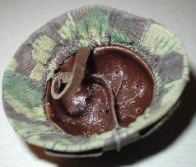
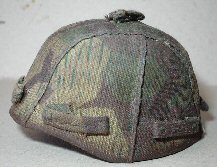
With the helmet for this figure I wanted a
splinter cover on it, but I could not get it to look right as it was too loose. So as an experiment I put some double sided tape
on the edge inside the helmet, I then put the helmet cover on and pulled it
tight pressing down on the inside edges. I found that it did help to hold the
material in place, and I got the shape I wanted as shown above.
Note: This is not a permanent fixture, as
the edges do come loose over time and need to be pressed back down into place.
But I prefer to do it this way, rather than use some kind of
cyanoacrylate
glue. Pictures 15. &
16. are of the new cover fitted onto the
helmet, and pictures 17. &
18. are after I have used the same
weathering technique on it, that I did for the smock for this figure.
19.
 20.
20.
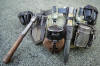 21.
21.
 22.
22.
 23.
23.
 24.
24. 
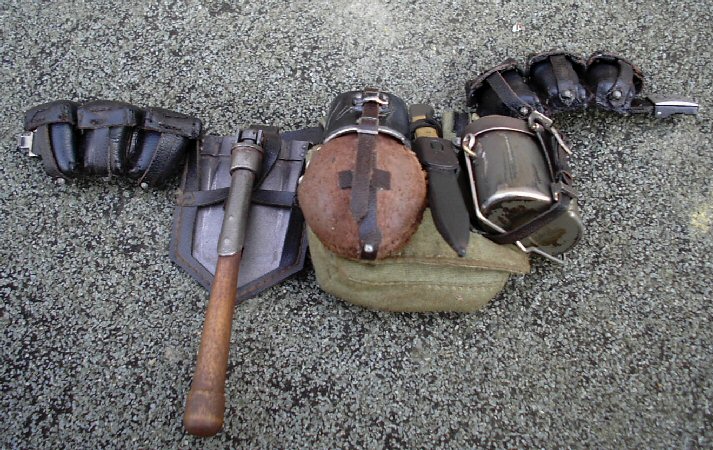
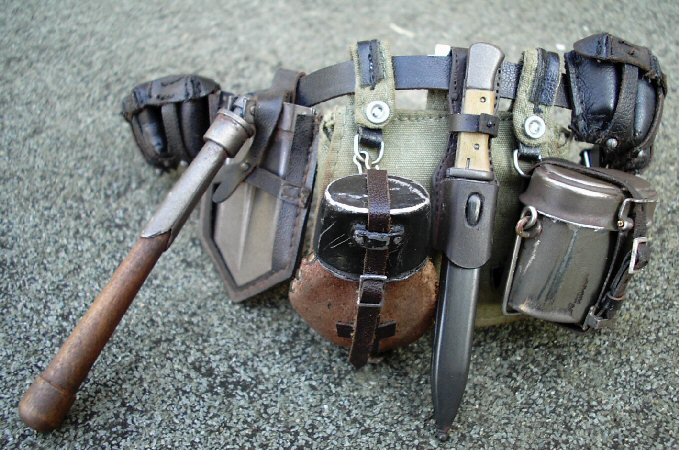
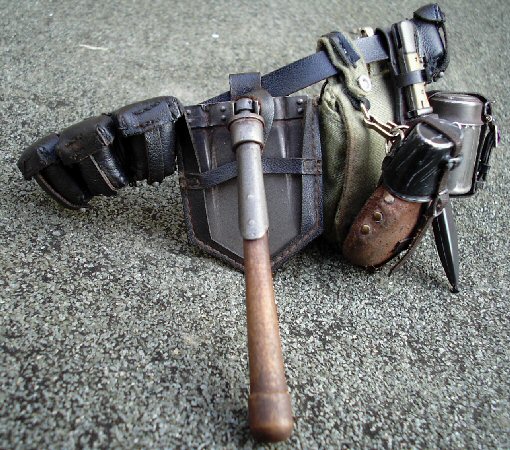
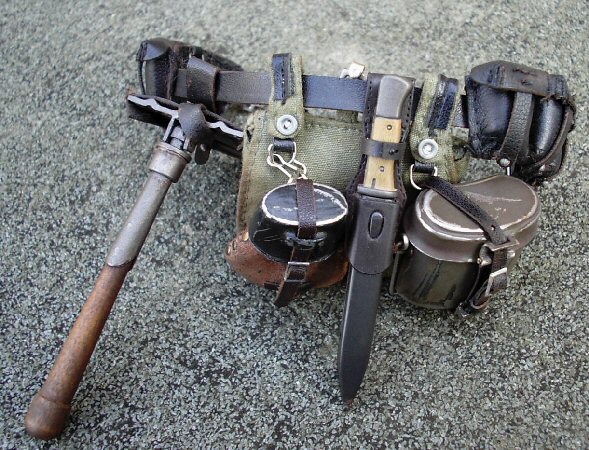
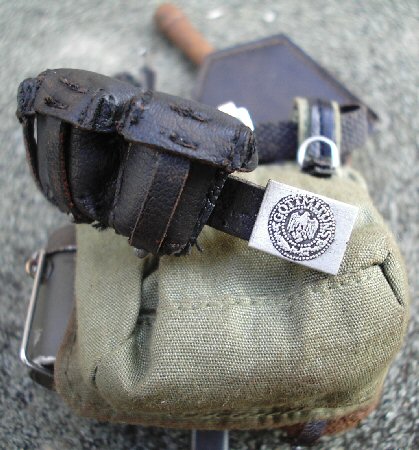
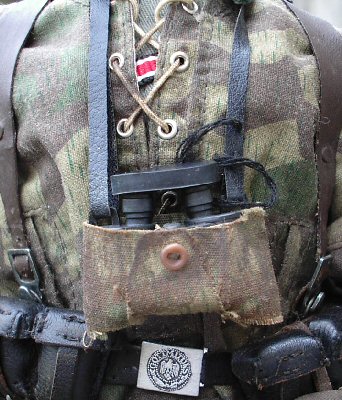
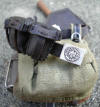
The pictures above are of the various parts for
the belt kit for this figure, all of which have been weathered the same way as
the pieces from my other
figures. The bayonet was placed on the top of the bread bag, mainly because of
the folding shovel which will not allow me to place it over it. So the only
other place I could think of for the bayonet was over the bag.
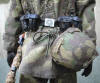
An experiment by me was done to get camouflage
cover for the binoculars as shown in Picture 24, which is basically a 'T' shape
of material cut out of a zeltbahn, folded over and stuck in place with double
sided tape, onto which I sewed a button. I have also put on my
Germans3 page how I did
this.
Backpack
26.
 27.
27.
 28.
28.
 29.
29.
 30.
30.
 31.
31.
 32.
32.
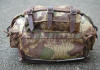
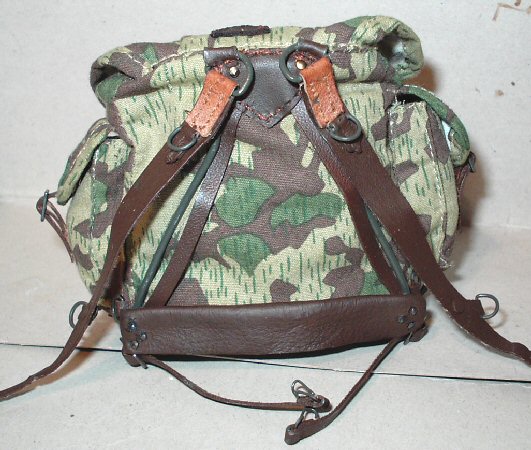
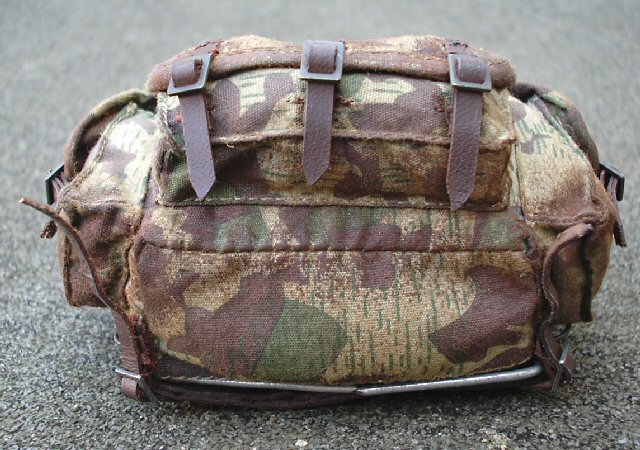
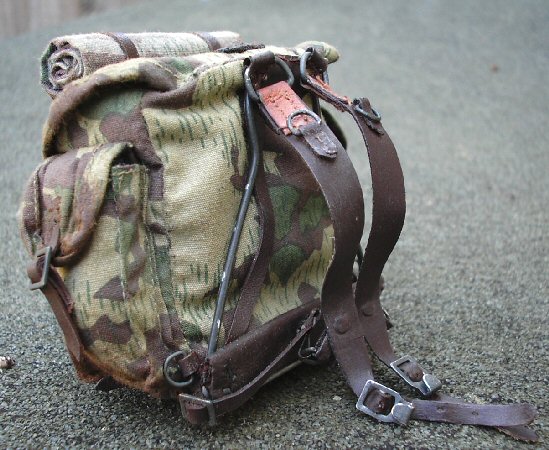
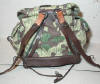
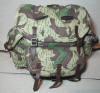
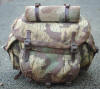
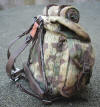
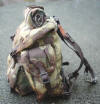
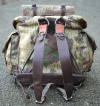
 The backpack from the Figures Home Handscar model
that I have managed to get loose, which I have adapted to fit a better metal
frame and straps. How I have done it is shown on this page -
Backpack. Picture
26. & 27.
show the altered backpack without any weathering done to it, in the next
pictures 28. - 32. I have added some similar weathering
to it that I did for the smock and trousers. The backpack from the Figures Home Handscar model
that I have managed to get loose, which I have adapted to fit a better metal
frame and straps. How I have done it is shown on this page -
Backpack. Picture
26. & 27.
show the altered backpack without any weathering done to it, in the next
pictures 28. - 32. I have added some similar weathering
to it that I did for the smock and trousers.
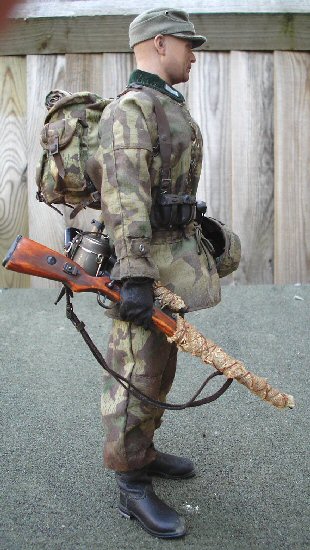
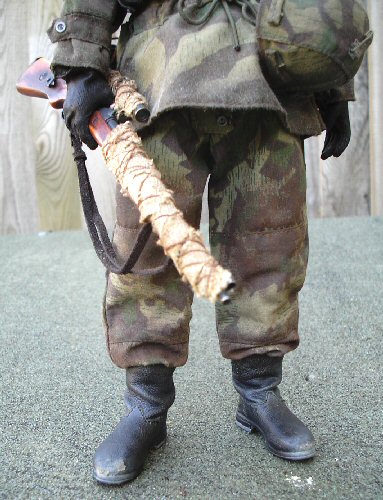
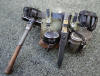
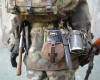
Weapons
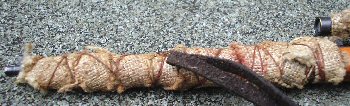
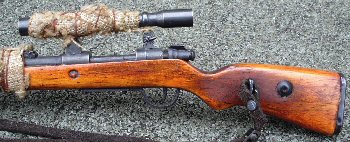
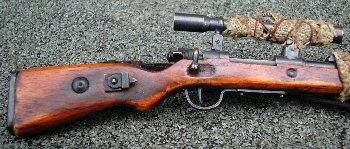
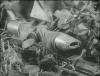
The main weapon for this figure is I believe a DiD
Kar 98 sniper's rifle, I bought it as a loose part but I can't remember from
which figure it came.
To weather the rifle I went over the wood parts
with some Brown shoe polish, which I then wiped off and then I rubbed in some
Brown pastel chalks. The rifle wrapping was made from some fine hessian material
which I cut into long strips, and then wrapped around the barrel and scope of
the rifle. I then got some thread and tied a knot around the barrel end, leaving
a long piece of thread hanging free, I then wrapped the thread around the rifle
wrappings to hold it in place. Gradually working up and back down the barrel, so
that when I came to the end, I just tied off the end with the thread I left
hanging earlier and when finished I just cut the thread ends off. The same was
done to the wrappings on the scope.
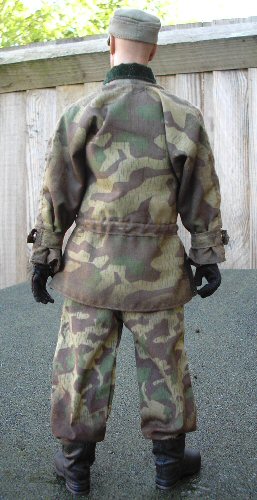
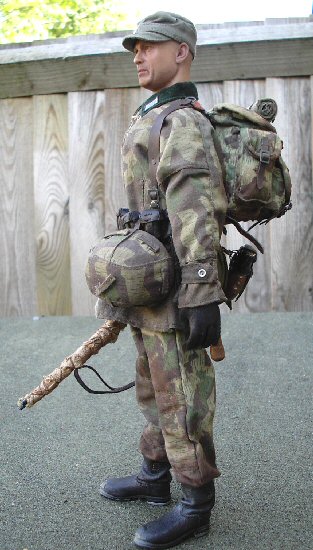
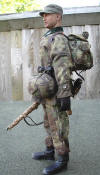
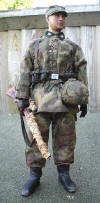
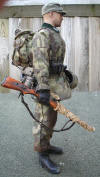
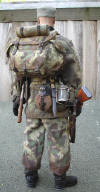
Various pictures of the figure
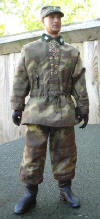
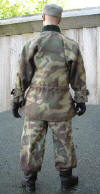
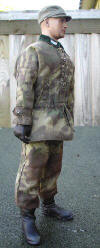
Assembled Figure


Reference Material
12.
 13.
13.
 14.
14.
 15.
15.
 16.
16.
 17.
17.
 18.
18.
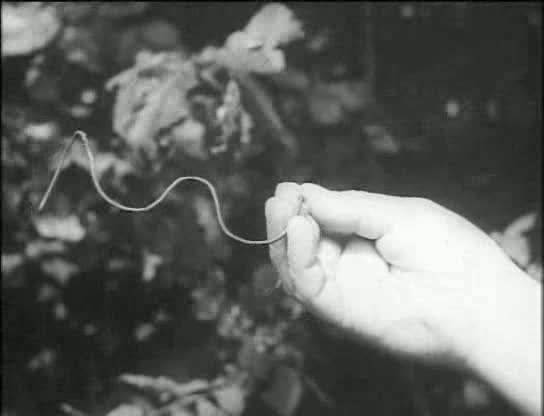
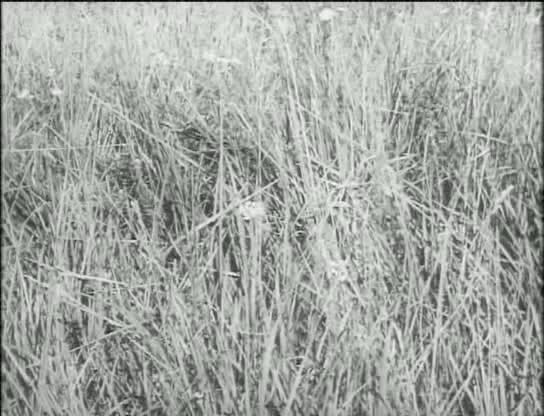
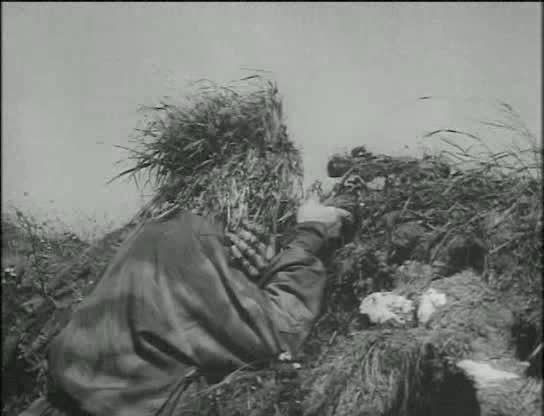
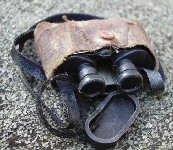
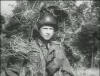
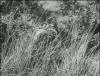
In the pictures above, I have taken some
screenshots of a German WW2 sniper training film translated into English by the
US army to get some reference material for this figure. Because I found very
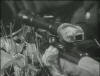
little information and pictures about the German sniper's online. Picture
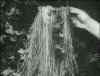
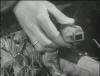
12. shows how one of the snipers have bent
some wire to the shape of a pair of spectacles, and in picture
13. how it looks when some grasses have been
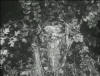
tied to it as a face veil. Picture 14. shows
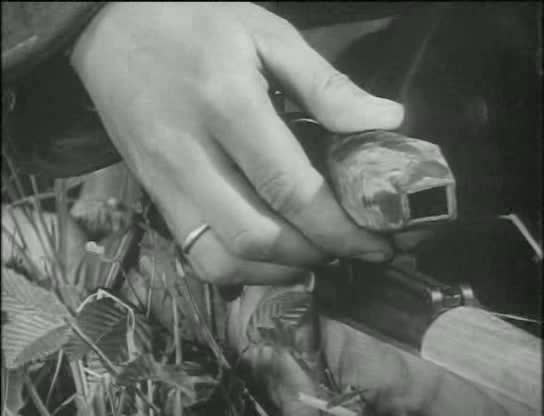
what the veil looks on the face of a sniper. Picture
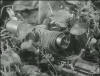
15. shows a telescopic sight with just a piece of material wrapped
around it, but the end of the scope is un-covered. So to conceal this from the
enemy and to stop the glass lens reflecting light, in pictures
16. 17.
& 18. the sniper's have made some different
types of slip on lens covers.
19.
 20.
20.
 21.
21.
 22.
22.
 23.
23.
 24.
24.
 25.
25.
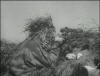
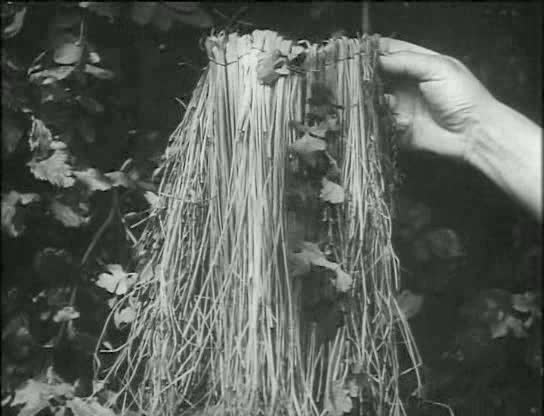
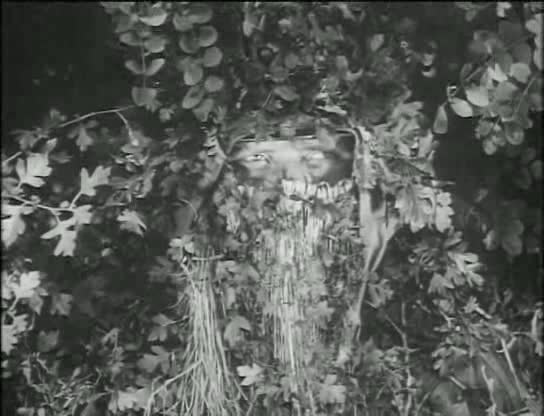
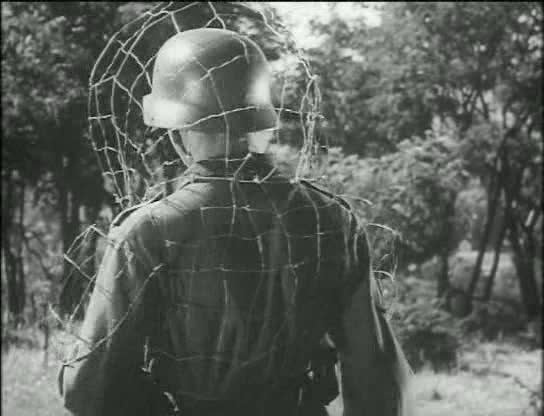
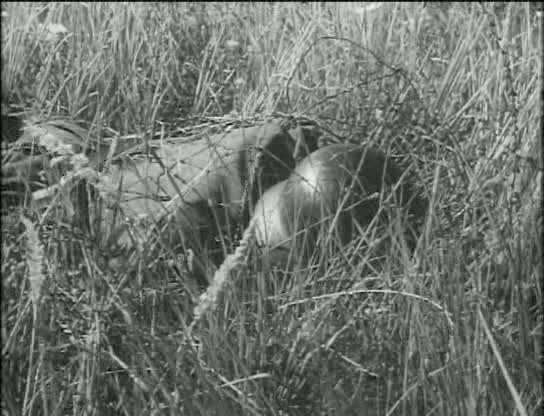
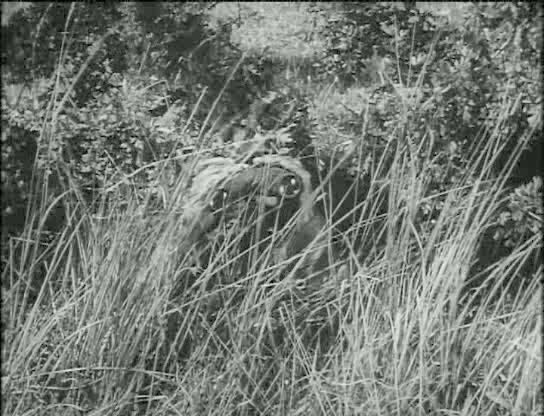
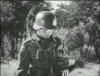
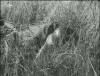
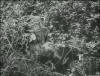
With these pictures above, pictures
19. & 20.
the German soldier is using a wire frame to conceal his shoulders and head,
picture 21. shows how he is fitting some of
the grasses to the frame, and in picture 22.
he is now hidden from view. Picture 23.
shows what he looks like when he stands up. Picture 24.
shows the same soldier from behind. Note: In
the film the narrator describes the purpose of this wire hood, that when it is
worn the sniper can turn his head and because the frame is bigger it will not
move and give away his position. Picture 25.
shows a picture of a sniper with helmet camouflage.
26.
 27.
27.
 28.
28.
 29.
29.
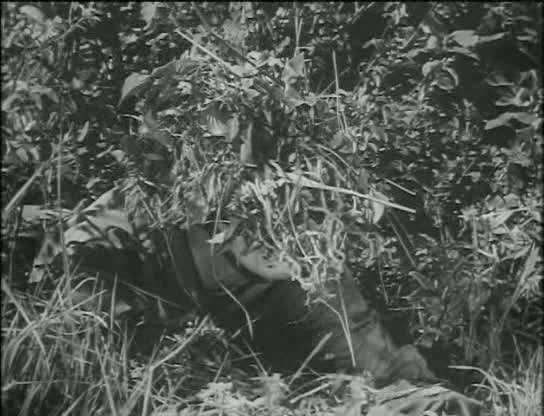
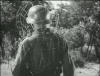
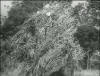
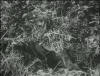
In picture 26.
the sniper is using a pair of binoculars which have been wrapped with some kind
of material to camouflage them, picture 27.
shows how a sniper has concealed his telescopic sight with some grasses. Picture
28. shows another type of face veil in use
by a sniper, picture 29. is of
another soldier with helmet camouflage. |